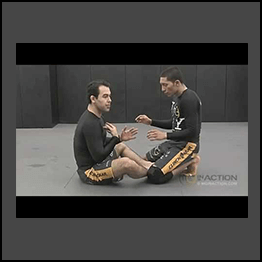
Marcelo Garcia – The Complete Back Attack System
See the step-by-step process Marcelo Garcia uses for getting to the back, getting his hooks in, attacking the choke, and finishing the fight
- Marcelo is a 9-time World Champion and known for getting to the back and finishing with the rear naked choke, even against much bigger opponents
- This four-part system covers taking the back, jumping back takes, maintaining back control, and finishing from the back
- Learn how to use these signature Marcelo attacks, like the rear naked choke, crucifix, and rolling back take
Part 1:
- TAKING THE BACK
- “Spinning” BACK-TAKE vs Single-Leg Escape, SEAT-BELT w/ Near-Side Tilt or Barrel-Roll
- Near-Side BACK-TAKE vs Single-Leg Escape, “Go-Behind” BACK-TAKE, “Spinning” BACK-TAKE from Side Control
- “Go-Behind” BACK-TAKE from Sprawl, SEAT-BELT w/ CRUCIFIX or BACK MOUNT
- Modified Scarf-Hold from “Go-Behind” BACK-TAKE vs Turtle Escape, Modified Scarf-Hold from Sprawl vs Guard Recovery
- “Throw-By” BACK-TAKE from Sprawl, Modified Scarf-Hold vs Turtle Escape
- “Go-Behind” BACK-TAKE from Sprawl, Sprawl w/ SEAT-BELT vs Single-Leg Counter to “Go-Behind”
- Sprawl w/ SEAT-BELT from “Go-Behind” BACK-TAKE vs Single-Leg, Back-Roll w/ SEAT-BELT vs Single-Leg Reversal
- “Go-Behind” BACK-TAKE w/ “Wrist-Rip” from Sprawl vs Turtle Defense, Modified Scarf-Hold w/ “Wrist-Rip” vs Turtle Escape
- Standing Closed Guard Break, Leg-Lock Escape, BACK-TAKE w/ Stacking Pass vs Inverted Guard
- Rolling Toe-Hold Escape, “Climbing” BACK-TAKE vs Rolling Toe-Hold
Part 2:
- JUMPING BACK-TAKES
- “Kuzushi” vs All-Fours, “Jumping” BACK-TAKE vs All-Fours, Rolling Leg-Lock Escape
- “Kuzushi” from BACK BODYLOCK, Front Head-Lock & Turtle Guard for BACK-TAKE or REAR NAKED CHOKE
- “Kuzushi” from BACK BODYLOCK, “Jumping” BACK-TAKE w/ SEAT-BELT, “Jumping” BACK-TAKE vs Quad-Pod or Standing
- BACK-TAKE from BACK BODYLOCK vs All-Fours, CRUCIFIX or Near-Side Tilt w/ SEAT-BELT, “Barrel-Roll” vs Turtle Escape
- BACK-TAKE from BACK BODYLOCK vs Turtle, “Barrel-Roll” & “Belly-Down” BACK RECOVERY vs Turtle/Back Escapes
- “Jumping” BACK-TAKE, Arm-Trap(s), “Re-Jump” vs Hook-Defense
- “Jumping” BACK-TAKE, Arm-Trap(s), 2x Cross-Wrist, “Jumping” BACK-TAKE & REAR NAKED CHOKE w/ CRUCIFIX vs Quad-Pod
- “Jumping” BACK-TAKE vs Quad-Pod, Near-Side Tilt w/ SEAT-BELT Control vs Quad-Pod
- “Jumping” BACK-TAKE & CRUCIFIX vs Quad-Pod, Near-Side Tilt w/ SEAT-BELT, “One-Armed” REAR CHOKE w/ CRUCIFIX
- “Jumping” BACK-TAKE w/ SEAT-BELT vs Standing & All-Fours, “Giant-Slayer” BACK-TAKE vs Standing
- “Giant-Slayer” BACK-TAKE vs Standing, SEAT-BELT Control w/ BACK MOUNT
- “Bolo” BACK-TAKE from Cross-Guard, BACK BODYLOCK from CRAB-RIDE, “Diving” BACK-TAKE from CRAB-RIDE
Part 3:
- FINISHING FROM THE BACK
- “Swing-Up” BACK RECOVERY w/ SEAT-BELT Control vs Turtle Defense
- “Swing-Up” BACK RECOVERY w/ SEAT-BELT Control vs Turtle Escape, REAR NAKED CHOKE vs Turtle Escape
- BACK MOUNT, Arm-Trap, “Swing-Up” BACK RECOVERY, Near-Side Tilt vs Turtle, “PEZ” Set-Up for REAR NAKED CHOKE
- Double Wrist Control from SEAT-BELT, REAR NAKED CHOKE w/ “Wrist-Wriggle, Crimp-Grip & Scrapes” vs Choke Defense
- “One-Handed” Finish for REAR NAKED CHOKE w/ “Crimp-Grip”, REAR NAKED CHOKE w/ “Recline” Finish
- Arm-Trap, Double Wrist Control, “Kimura-Grip” SEAT-BELT, “PEZ” Set-Up for REAR NAKED CHOKE w/ “Recline” Finish
- Arm-Trap, Double Cross-Wrist Control, “Wrist-Wriggle” & “PEZ” Set-Up for REAR NAKED CHOKE w/ “Gable-Grip”
- Arm-Trap, 2x Cross-Wrist, “Wrist-Wriggle” & “PEZ” Set-Up for REAR NAKED CHOKE w/ “Gable-Grip”, “Jumping” BACK-TAKE
- Arm-Drag to Sit-Out Single-Leg Take-Down, Arm-Drag to BACK-TAKE vs Quad-Pod, Near-Side Tilt w/ SEAT-BELT Control
- Single-Leg w/ “Run-the-Pipe” Finish, “Kuzushi” from BACK BODYLOCK w/ Single-Leg, “Jumping” BACK-TAKE w/ SEAT-BELT
- Single-Leg & “Back-Door” Finish from Butterfly w/ 2-On-1, “Jumping” BACK-TAKE w/ SEAT-BELT from “Back-Door” Single-Leg
Part 4:
- MAINTAINING BACK CONTROL
- “Barrel-Roll” BACK RECOVERY vs Turtle/Back Escapes, “Reverse Back-Hook” vs Back Escape
- “Bridge-Over” w/ SEAT-BELT vs Turtle Escape, “Barrel-Roll” vs Turtle Escape, CRUCIFIX w/ SEAT-BELT Control
- “Belly-Down & Cart-Wheel” w/ “Crimp-Grip” vs Back Escape to BACK RECOVERY or REAR NAKED CHOKE w/ “Recline” Finish
- “Faze-Through” w/ SEAT-BELT & “Crimp-Grip & Scrapes” vs Back/Choke Defense, REAR NAKED CHOKE w/ “Recline” Finish
- “Faze-Through” w/ SEAT-BELT vs Back Defense, Double Wrist Control or Double Cross-Wrist to SEAT-BELT Control
- “Faze-Through” w/ SEAT-BELT vs Back Defense, “2-On-1” SEAT-BELT & “Power-Half” BACK RECOVERY vs Back Escape
- “Faze-Through” w/ SEAT-BELT vs Back Defense, “Wrist-Rip” vs Choke Defense, REAR NAKED CHOKE vs Back Escape
- “Barrel-Roll” vs Back Escape, “Faze-Through”, “Crimp-Grip” & “1-On-1” Wrist Control w/ SEAT-BELT vs Back Defense
- CRUCIFIX vs Quad-Pod, Mounted CRUCIFIX vs “Slide-Out” Escape, Inverted Triangle from Mounted CRUCIFIX
Archive : https://web.archive.org/web/20200718070530/https://bjjfanatics.com/products/the-complete-back-attack-system-by-marcelo-garcia
Shipping method
– After making a purchase, you will see a View your order link to the Downloads page. Here you can download all the files related to your order.
– In case the link is broken for any reason, please contact us and we will resend a new download link.
– If you can’t find the download link, please don’t worry about it. This course is usually available and shipped within one day
– The course you purchased will have lifetime access
– Our support staff is the best by far! Please contact us at email: [email protected] and we will be happy to help!